Tuesday, April 30, 2013

Untried Polish Challenge Day 4: Neutral

Hello everyone! I am super excited to share my newest manicure with you today. Day four of the untried polish challenge calls for neutral polishes. I went to my good ol' Ciate miniatures and picked out Cookies and Cream as well as Angel Wings. My first thought was to do a jazzed up French manicure but then I found some feathers in my dad's old hobby room. The colors matched so well with Cookies and Cream that I decided to attempt to do a feather manicure. This is the first time I have done this manicure and I'm hooked. I am so in love with it that I plan on keeping it more than a day or two! I'll attempt to walk you through the technique I used (it's really quite simple) and, as always, there will be pictures. Lets begin (THIS IS PICTURE HEAVY TODAY).


Cookies and Cream on the left, Angel Wings on the right


First, I painted my nails with three coats (all of right hand and ring finger, pointer finger, and thumb of left hand) of Cookies and Cream. On the other two fingers (ie, middle and pinkie of left hand) I painted three coats of Angel Wings. I let this dry pretty much completely. I then used a bobby pin (because I don't own a dotting tool) to place dots of Cookies and Cream to the two fingers painted in Angel Wings (see pictures below). After I got the easy stuff out of the way I began adding the feathers.

Adding the feathers was much easier than I thought it would be. I used a liberal coat of clear polish (not fast drying though) to the nail I wanted the feather to go on. I immediately placed the feather (gently!) the way I wanted it onto the wet clear coat. After about 30-60 seconds I gently pushed it down using a bobby pin (tweezers would also have been a good idea) to secure it in place. After I waited a few minutes I used a liberal coat of Seche to lock the feather in place. I then proceeded to wait about 5 minutes before I trimmed the excess feather off, like so:

Right hand (no dotting) PC with feather overhang

As you can see, the edges of the feather are rough and uneven. After the Seche layer is dry (just be patient because it's worth it) you can try and trim more of the overhanging feathers off. It's going to be pretty damn hard to get it all, so once everything is dry and cut as short as you can, it's easy to file the rest to match the length of your nail (I found that if I used enough Seche that the feathers became stiff after it dried, which made filing so easy). Once it's filed the way you want you may see some edges that aren't perfectly smooth. That's easily taken care of with more top coat. The result should look like something like this:

Left hand PC with filed tips

After you've filed and gotten everything as smooth as you can, just simply proceed with normal clean up. I currently use cotton swabs and pure acetone. Then wash your hands, use lotion/cuticle oil (because acetone is horrible, as you all know) and enjoy your awesome feather manicure. Here are a few more images to show you:


Left hand after clean up. Notice how my pointer has changed. I may have ruined it at work before I had a chance to get good, sunlit pictures

Slightly different angle


Thumb of right hand (the nails that never grow)


Rest of right hand


All three pretty feathers together

Alright that's all of them! I am so in love with these. I definitely think this is a really easy way to spice up a neutral manicure. With the right amount of top coat (don't be shy about using more than normal) you won't even feel the feather on your nail. Every time I look down at my hands I can't believe how happy they make me. If you have any questions/comments, don't hesitate to ask! Thanks for reading, and be sure to check out the blogs of the other wonderful ladies doing the challenge along with me:

Amy at Fancy Side
Blueberry Pie at Blueberry Pie (who I accidentally posted the wrong link to last time. I apologize)
Jonochi at Just Add Polish
Masha at Lost in Lacquer
Raine at Lacquer Lily
Sam at Polished Art

If I missed anyone or you are doing the challenge too and would link me to link you, let me know! Thanks for reading.


Saturday, April 27, 2013

Untried Polish Challenge Day Three: Three Colors

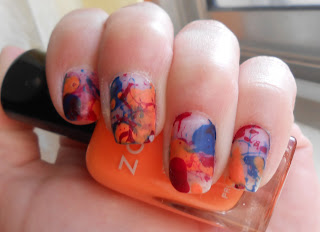
Hello! I hope everyone had a wonderful Friday. I am really excited to see what everyone did for their challenge today. I'm sticking with the order that was given to us because that is easiest for me. For day three, three colors, I attempted to do splatter nail art. I have done this once before and I was a bit dismayed to realize that this time was just as messy as last time. Last time I tried to use the brush to gently drip/splatter polish across each nail and, instead, ended up with a pretty big gloopy mess. This time I used those tiny red coffee straw/stirrers and attempted to splatter the polish on each nail by blowing the polish. This was a little better, but I still got a huge spot of paint here and there. Here are the results:

Polishes used (from left to right) are Dangerous Affair (Ciate), Jancyn (Zoya), and Power Dressing (Ciate)

Here is the splatter effect as seen in the sunlight

Here is the splatter effect at a different angle

I finished the design with a matte top coat from Warpaint Beauty (bought at Hot Topic) because I feel that the matte gives it a more artistic feeling. You can see that there are a few big splotches here and there. However, this is much better looking than the first time I tried this technique (I don't have a picture of that though). I wouldn't recommend this technique if you (like me) are easily upset when you get messy or when things don't go perfectly. However, if you have done this with a better outcome I'd love to know how you did it. 
Make sure you take a look at the other ladies who are also doing this challenge (in alphabetical order):
Amy at Fancy Side
Blueberry Pie at Blueberry Pie
Jonochi at Just Add Polish
Masha at Lost in Lacquer
Raine at Lacquer Lily
Sam at Polished Art

Lastly, I am currently in the process of adding my new polishes to my etsy store so feel free to take a look if you'd like. Happy challenge to you all!


Friday, April 26, 2013

Earth Week Collection Day Five: Blossom

Hello all. I am enjoying my Friday off and I hope you all have a great weekend coming up. Today is the last day of posting images of my new collection. For my final earth inspired polish I give you Blossom, a pink polish with a very subtle gold to green duochrome effect. This is the only non-metallic color in this collection; it's more of a jelly than anything else.

Here it is in the bottle in natural sunlight (obviously)

Here is a swatch in some soft, indoor light (sun filtered by a window)

As you can see, this polish is a soft pink with a more jelly like consistency. I used three coats of Blossom for this swatch. I like the formula for this polish; it's not thick but it's not too thin. It's very easy to apply and it looks great with gold, silver, grey etc. There isn't much more I have to say about this polish.

That concludes my newest line of polishes. I hope to have them up on my etsy site either tomorrow or Sunday. Be sure to check back tomorrow when I will compete another of the untried nail polish challenge. Until then, enjoy your Friday! 

Thursday, April 25, 2013

Earth Week Day Four: Merry Gold

Hello, and a happy Thursday to you all. Today I have the fourth polish in my new line of earth inspired polishes. Merry Gold is an ultra sheer golden yellow polish that can be worn on its own, but also goes on well over more opaque polishes. I like it both on its own and layered over other polishes, but I think I prefer to paint and extra layer or two and have my entire nail be gold. I have a disclaimer I want to get out of the way before you see the picture: My eyes see the gold on my fingers to be at least two shades darker than the photo makes it seem. I tried really hard to capture the accurate opacity of real life but my camera refuses to cooperate. I'll let you see for yourself:


I used China Glaze's "Liquid Leather" as well.


Here it is alone in the bottle.


Here it is both by itself and over Liquid Leather. See how sheer it looks? That is not what my own eyes see.

I could bitch about how sheer my camera made this swatch to be, but that won't really help me, so I won't. I used four coats on the nails that are Merry Gold alone. I used one coat of Liquid Leather on my middle finger, let it dry, and added one coat of Merry Gold over that. As always, I finished up with Seche Vite. I'll admit that when I ordered the pigment to make this polish I thought that it would be a lot less yellow in hue. I guess that's just another excuse to buy even more pigment! ;)

Well that is all I have for you today. Tomorrow is my day off from work and if I'm not super lazy I hope to do something with my new liquid sands from OPI's Bond Girl collection. Enjoy!

Wednesday, April 24, 2013

Untried Polish Challenge Day Two: Two Colors

So I rushed for an easy design to do so that I could make it on time for today's challenge. For today we are supposed to use two colors of polish that have never been used before. I chose to do a glitter gradient using Blues Cruise (Ulta's brand of polish) and Trixie (Zoya). Let's get to it!


Here are the two colors I used (flash)


The nail art. My skin is a tad dry today :(

I have to say that Blue Cruise is not the polish I expected it to be. I was thinking it would be more glitter heavy but it had more of the blue, sheer colored base in relation to the glitter. I used the sponge gradient technique to do this manicure. I used three coats of Trixie, let it dry, painted a streak of Blues Cruise on a plastic sandwich bag, painted a streak of Trixie underneath it, gently swirled a bit where the two polished met with a toothpick, then dipped my sponge into the mixture and applied to my nails. I have to do this about three times per nail to get a decent gradient going. Afterwards I used a layer of Seche for a top coat to try and smooth it out as much as I could. 

I really wish Blue Cruise was more opaque so that the gradient would have looked better. My skin is also very dry today and no matter how hard I try, I still have glitter on my fingers. It's always a beast to clean up. I feel like this kind of looks bad here in the picture, but when I look at it on my hands I do like it. I probably won't use Blues Cruise again for a gradient, but that's why we have this challenge, right?

Also, here are some lovely ladies who are also doing this challenge (in alphabetical order):
Amy at Fancy Side
Blueberry Pie at Blueberry Pie
Jonochi at Just Add Polish
Masha at Lost in Lacquer
Patricia at Polished and Glittered
Raine at Lacquer Lily
Sam at Polished Art


Earth Week Day 3: Sunrise Serenade

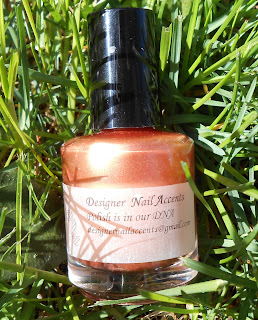
Hello everyone. So today is a super busy day for me and I hope to have my challenge up today but I may have to postpone until tomorrow. I know, it's unacceptable! I apologize if it's late. It won't happen again! On a happier note I'd like to share my third new polish creation with you today. This is yet another metallic that I call Sunrise Serenade. It's a pretty peachy orange that I absolutely love. I personally don't own anything like it; it's my favorite polish that I've created thus far, and I've done holos! I have a few pictures for you, as always:


Here it is in the bottle. I didn't realize there was this much glare. My  bad.


In direct sunlight


In the shade

As always I used a layer of Seche Vite on top to smooth it out. Unlike most of my polishes, I only used two coats to achieve this amount of opacity. I usually don't buy metallic polish but making this one has really made me want more (as well as making me want to make/experiment with more). There is one slight disclaimer I feel obligated to share with you all. Today at work after washing my hands for the bajillionth time I realized that I lost an entire layer off of one finger. This polish peeled very easily, however, I usually use OPI's base coat and for this I used a clear coat that's supposed to fight yellowing (if you're curious about the name I can comment on it later) so this may have had an impact on it. I'm not sure. Anyway, that's it for now. I need to get started on day two of the challenge, which is two colors. Enjoy!

Tuesday, April 23, 2013

Earth Week Polishes Day Two: Southwestern Sunset

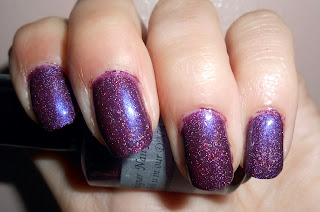
Hello all! As promised I have the second of my five new Earth themed nail polishes to share with you today. Today I bring you a lovely purple shimmer/metallic that mirrors Deciduous Forest (shown yesterday) in formula. I also bring you a bonus Seche Vite mishap, which you will clearly be able to see. Here are three pictures for you all:
In the bottle, in a mixture of sunlight and shade


In direct sunlight with three coats


In the shade with three coats

So as we can see, sometimes Seche Vite likes to shrink nail polish. I have never had this happen to me before but I have heard many stories of the numerous beautiful manicures ruined by Seche. I decided to leave it on because sometimes shit happens (I'm not perfect in the least bit) and it kind of gave the nail a cool foil effect (although here it just kind of looks like a prune). 

As for the formula: this one is a little lighter than more of my pigmented polishes, but it builds after two to three coats. It contains only the purple pigment (no jelly dye) and it really sparkles in the sunlight. There is nothing wrong with the formula, but the polish that I'm going to show you tomorrow was made in the same fashion (the pigment is much more metallic though) and I find it to be so much more amazing. Until tomorrow take care and don't forget that tomorrow is also day two of the untried polish challenge! Thanks :)
Monday, April 22, 2013

I'm Expanding Earth Day to Earth Week! Day One: Deciduous Forest

In honor of our loving planet Earth I have decided to give you a swatch a day of my new 5 polish collection inspired by planet Earth! At the end of the work week I will celebrate this by releasing all 5 polishes to my etsy shop. I will start today with the obvious choice of a beautiful earthy, shimmery/metallic green called Deciduous Forest:
Here it is in the bottle, up a tree, in the sunlight


Here we have it outside, obviously, in a shaded part of the yard


And lastly here it is in the direct sunlight.

As you can see it has both a shimmery and a metallic effect to it. It's very unlike anything I usually wear, but it's so fun to turn your hand to get all aspects of the pigment. I also love how it behaves differently in the sunlight. In these photos I used three coats and well as a top coat (Seche Vite). I would highly recommend using a top coat because metallic pigments have a tendency to make polish formulas more apt to streaking. However, that's one of the things I love about metallic style polishes so it doesn't bother me.  Thanks for taking time to look at my newest creation. Tomorrow I will give you a purple polish. Don't forget that Wednesday is the next installment of the Untried Polish Challenge! I hope you all have a splendid Earth Day. :)

Sunday, April 21, 2013

Untried Polish Challenge Day 1: One Color

I hope you are all having a lovely weekend. I know I am. Yesterday I posted about the new polish challenge created by Jonochi over at Just Add Polish. We have a lot of other bloggers joining us too! Check out Masha over at Lost in Lacquer, Raine at Lacquer Lily, Amy at Fancy Side, Sam at Polished Art, and Patricia at Polished and Glittered. Alright that's all of us! Let's begin with the color I chose. 


This polish is Cupcake Queen by Ciate. I will probably be using a lot of the Ciate mini's because I got the advent calendar set of 28 at Christmas and I have let many of them sit untouched. This color reminds me of butter LONDON's Disco Biscuit. Here it is on my nails: 


This color is a really pretty hot pink with some blue shimmer undertones, just like Disco Biscuit. It's very hard to see the blue with my camera, but if you get Cupcake Queen in the sunlight it shows up pretty well. It has a great formula. It's not thick and it goes on very smoothly. I used three coats because that's my preference but two coats looks fine too.

Well there isn't much to say about this polish beyond that. I know both Ciate and butter LONDON are expensive brands, so I understand if you can't afford to get these polishes right away. If anyone knows of a drugstore brand that is similar let me know! I hope you enjoyed this very simple Day 1 Challenge. The next challenge is two colors and is scheduled to post on the 24th of April.

Saturday, April 20, 2013

The "Untried Nail Polish Challenge"

Hello all! I'm excited to announce that tomorrow will begin the Untried Nail Polish Challenge, created by Jonochi over at Just Add Polish. This is a 16 day challenge that requires 19 polishes that have sat around in your collection untouched.

The days that I, along with other bloggers who I will link you all too once I begin tomorrow, is as follows: April 21st, April 24th, April 27th, April 30th, May 3rd, May 6th, May 9th, May 12th, May 15th, May 18th, May 21st, May 24th, May 27th, May 30th, June 2nd, and June 5th. I'm excited to get started!

Monday, April 15, 2013

Pretty in Pink and Happy Holo's Swatches/Reviews

Hello everybody. I hope you all had a great weekend.  Today I'd like to take a moment to give a big shout out to two wonderful bloggers who have taken the time to review my first collection for me. The first is LostinLacquer. Check out her reviews here as well as her blog. The second blog that I would like to mention is ThePolishedMommy. She reviewed my polishes here. Check out her blog as well. Both these ladies do some amazing work and I'm very grateful to them for helping me get my polishes out there for you all to see.

I would also like to share with you a new polish I created over the weekend, as well as some simple art I did to highlight it. I added a gold to green duochrome pigment to a bubble gum pink color. While the duochrome is not captured well on camera, I still would like to share a picture with you. Here is the pink (which is still unnamed) on my nail:

This is three coats of pink over one layer of OPI base coat with one layer of Seche Vite on top.

This color inspired me to do something slightly more feminine than I am used to. I really wanted to get a somewhat vintage look, so I decided to stamp Orly's Luxe over it. Here is the result:

The stamp I use is a Konad stamp. The plate is BM21 (Bundle Monster). After I stamp I add a layer of Seche Vite as quickly as I can. This is usually the best way to keep the stamp from streaking. This pink color that I made will be available on my etsy shop once I make a few more new polishes to go along with it. I hope you enjoy!

Friday, April 12, 2013

Peacock Inspired Glitter


Hello again! Today is one of those days where all I want to do is show off my nails. I painted my nails in Zoya's Storm earlier today and used that as the basis for my galaxy nails. This left me with one hand (my dominant right hand) without any nail art. I just couldn't let it sit there without something else on it so I decided to paint my very own peacock themed glitter top coat, which I so cleverly am calling Proud Peacock, right over the holo goodness that is Storm. This is the result:


It's very hard to tell from this picture but the glitter polish actually does have tiny gold/bronze flecks in it. I absolutely love this combination, and I don't usually go for glitter (it's too much damn trouble). However, I love anything peacock related, so peacock inspired glitter is my cup of tea. I have this on sale in my etsy shop. You can find the link here. Also, don't forget to use coupon code "POLISH" at checkout for 10% (not including shipping). One last reminder: AFTER I GET 50+ SUBSCRIBERS TO MY BLOG I AM DOING A GIVEAWAY. Also, you can check out my facebook page here. Thanks for reading!


Galaxy Nails

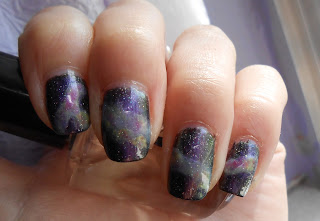
Hello all! Today I have had some time to do some actual nail art. I decided to revisit the classic galaxy nails. I learned how to do this from watching this tutorial. Today I have done it slightly different, but the results are fairly similar. Let's get started!

The colors I chose for this manicure are Storm, Indigo, and Dana from Zoya (which are black, dark blue, and pink, respectively) as well as Big Yellow Taxi from Ciate (which is yellow, obviously) and Tomorrow Never Dies from OPI (which is a purple with blue undertones). The white that I used was one I made called Frost (you can read about it a couple posts down).

I used two coats of Storm to begin. After it was completely dry I sponged on the white, creating the pattern for the galaxy I wanted. I had to sponge this color the most because the white is pretty sheer, especially against the black. I sponged it about three times. I immediately sponged the yellow over the white, leaving a little bit of the white showing behind it. This part of the sponging is where you get to decide how sheer you want each color. After I sponged the yellow I immediately sponged pink over it, using the technique I just mentioned. I usually like the pink layer to be a little more sheer than the other colors. After the white, yellow, and pink have been sponged I used the purple color to sponge the outer part of the galaxy, which is where the white and the black part meet. I made sure that this color wasn't too saturated on the sponge, because it will come out very dark. After this I used the blue to sponge just beyond where I sponged the purple, or where the purple and black now meet. This is the result:

You may be able to notice that I have not smoothed it out with a top coat yet. Most people like to use a dotting tool at this point to add little white stars. I felt I didn't really need this because Storm already kind of looks like stars to begin with. If I use a plain black I will dot some stars, both tiny and slightly bigger. At this point I decided that I wanted to try using butter LONDON's Knackered as a top coat. It's very sheer and looks good over almost anything. I tried to use a very thin layer of Knackered so I wouldn't completely hide the design I just made. Here is the result:

You can see that depending on the angle the design isn't too poorly hidden. In the direct sunlight it is even more visible behind the Knackered top coat. In this picture I did add a layer of Seche Vite to aid in smoothing out the polish.  So which one do you prefer? Would you have added additional stars? Thanks for reading and I hope you enjoyed!

Wednesday, April 10, 2013

Hello! I thought it might be time for a little update.

As some of you may know I now have officially opened my Etsy shop. You can visit the shop here if you are interested. For the first few orders I have created a coupon code to let you get 10% off your entire order. Just use code "POLISH" at checkout (this does not cover shipping). Currently, I can only ship to the US and Canada, but if I ever expand I will try to look into more international shipping. Also, for those of you with a facebook page, you can now follow me on facebook here. Once this blog gets 50+ followers I will be doing a Zoya giveaway! Let any fellow polish lovers know.

I am currently working on some sparkly top coats (ie, gold leaf and glitter) as well as getting a little more of my nail art on my blog. Hopefully I can get some nail art on here tomorrow or Friday. It's hard to do it all when I have to wake up at five for work :/ If there is any particular type of nail art you'd like to see comment below! It's been too long since I've gotten the polishes out!

Thursday, April 4, 2013

Sponged Spring Nails

Hello all! Today I finally had a little extra time to myself so I decided to take a small break from my own nail polish line and do some nail art. I didn't have a whole lot of time so I decided to use the gold old makeup sponge to create a really simple design. If you want to recreate this design you will need a makeup sponge cut up into small pieces (one for each color). The colors I used were butter LONDON's Sprog, Fiver, and Fruit Machine as well as Big Yellow Taxi from Ciate.


I started out by painting each nail one solid color, using a different color for each nail (on this hand I painted both my pinkie and pointer finger with Fiver since I only used four colors total). After each nail was dry I carefully painted a small piece of sponge in a different color, using a total of four sponge segments in all. I slowly dabbed the painted sponge over the nail, let it dry, then repeated the process with a different colored sponge. I continued this until I got the pattern I wanted for each finger.

To top this mani off I used Seche Vite. I will admit that this time I didn't use a base coat. I have misplaced mine for the time being. Usually I will use OPI's base coat. The makeup sponge is one of the greatest tools for nail art, in my opinion. It's not hard to use and you can use different sizes to obtain varying amounts of coverage. This photo was taken inside, but this time I had the pleasure of taking a picture in a sunny area.  I hope you enjoy and let me know if you have any questions!

Tuesday, April 2, 2013

Happy Holos Collection: Part Two

Yesterday I introduced you to the first half of my first collection of franken polishes. I gladly give you the rest of these polishes today. I also forgot to mention that I do plan on opening an Etsy shop if anyone is interested in any of my polishes. I also got some new pigment in the mail yesterday so more polishes are sure to come, but I digress. Here are the last three polishes in my Happy Holos collection.

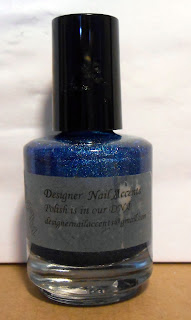
Julia: I had a hard time coming up with a name for this stunning polish. My sister (Julia) is a super chill person who likes the color blue and is as excited about making polish as I am (when I let her touch my stuff, that is). So I present to you all the first ever polish I have named after someone. Here it is in the bottle:

I used two coats of polish for this level of coverage:
In "artificial" light

With flash

Royally Confused: This purple polish is so names because it has a slight blue duochrome effect, which is very hard to see in these pictures. It's mostly a purple, but it's kind of blue as well. Let's just say that the lighting doesn't do it justice. Here it is in the bottle:

I used two coats of polish for this level of coverage:
In "artificial" light

With flash

Frost: Last but not least is my white holo. It is much more sheer than the other six (which is to be expected with a white polish). If you use two or three light coats you get a nice, sheer white with your natural nail lines showing ever so slightly. I attempted to show you what a more opaque version of the polish would look like. The other day I had this on when I was driving. I caught a glimpse of it in the sunlight and it reminded me of fresh fallen snow on a sunny day. These pictures don't really capture the holo pigment all that well. Here it is in the bottle:

I used four coats of polish for this level of coverage:
In "artificial" light

With flash

This concludes this collection. I hope you liked what you saw! Like I said, I do hope to sell these at a later point. I also am sending a few bloggers some samples for their honest review of the polishes. If you have any questions please ask! You can comment, visit my facebook page here, or e-mail me at designernailaccents@gmail.com


Monday, April 1, 2013

Introducing the "Happy Holos" Collection! Part One

Below is a photo of the seven polishes that make up the Happy Holos collection. Each bottle is 15 ml and contains a beautiful holographic polish. My hope was to take pictures of them in the sunlight, but the weather did not want to cooperate.

Fast and Furious: The first polish in this collection is a bright red polish so named because it would be the perfect color for any sports car. Here it is alone in the bottle:

I used three coats to obtain this level of coverage.
In artificial light

With flash

Pop of Orange: This color reminds me of an orange flavor popsicle. It's gorgeous in the sunlight and it really brings something special to a color that not a lot of people like. Here it is in the bottle:

I used three coats to obtain this level of coverage.
In artificial light

With flash

Team Midas: This polish is a golden yellow. I'll admit that I was going for a bright, lemon yellow but I don't mind this tone. I can see how it might be harsh on some skin tones though. Here it is in the bottle:

I used three coats to obtain this level of coverage.
In artificial light

With flash

Poseidon's Pool Party: This is one of my favorite color's in the collection. It's a turquoise green and is stunning in the sunlight. Here it is in the bottle:

I used three coats to obtain this level of coverage:
In artificial light (I smudged the pinkie so I kindly cropped that out for you all)

With flash


I will end here with part one of my two part post for this collection. In the next post I have a blue, purple, and white holographic polish to show you all. I hope you like them so far!